Launch an EC2 instance with an unconfigured VRPipe AMI
An EC2 instance ('node') is a machine you can ssh to and run software on. The operating system and available software is determined by an Amazon Machine Image (AMI).
This guide will show how to launch an instance that has VRPipe almost ready to use, but not actually configured or installed. Such an instance is a good starting point for quickly getting going with VRPipe, since the time-consuming part (installing VRPipe's many dependencies) is already done.
When launching a new EC2 instance you can either use an existing VRPipe AMI (one we provide for public use, or one you've previously made for yourself), or create your own based on your preferred OS.
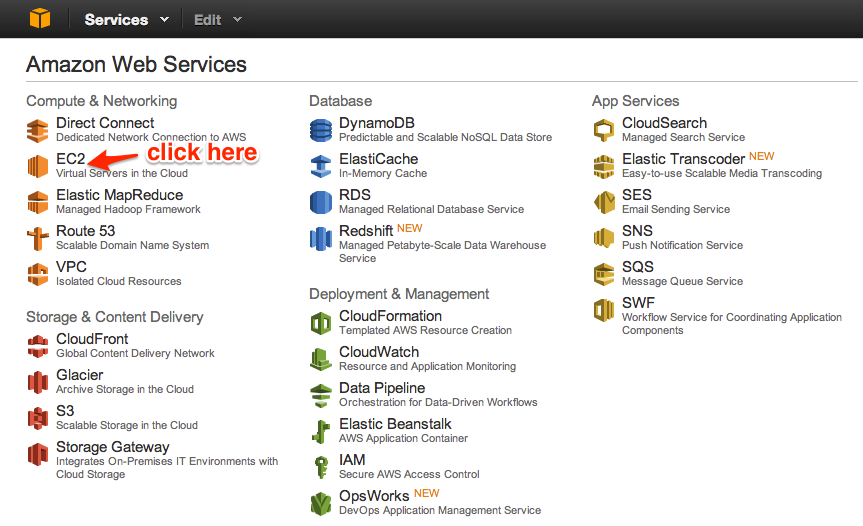
- Starting from your console home, click the EC2 icon.
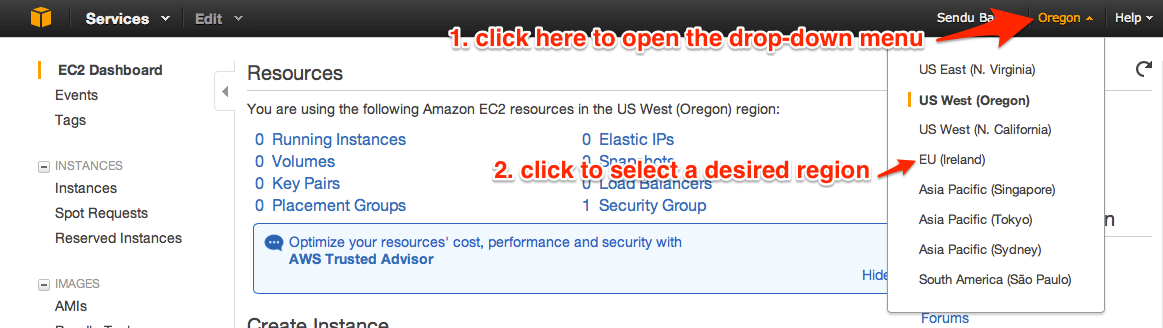
- On the resulting EC2 Management Console page, select the most appropriate (closest) region for you.
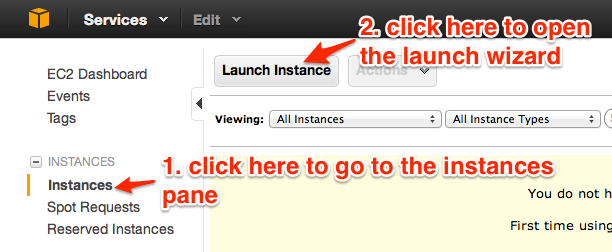
- On the left hand side, click on the 'Instances' link to go to the Instances pane, then click the 'Launch Instance' button.
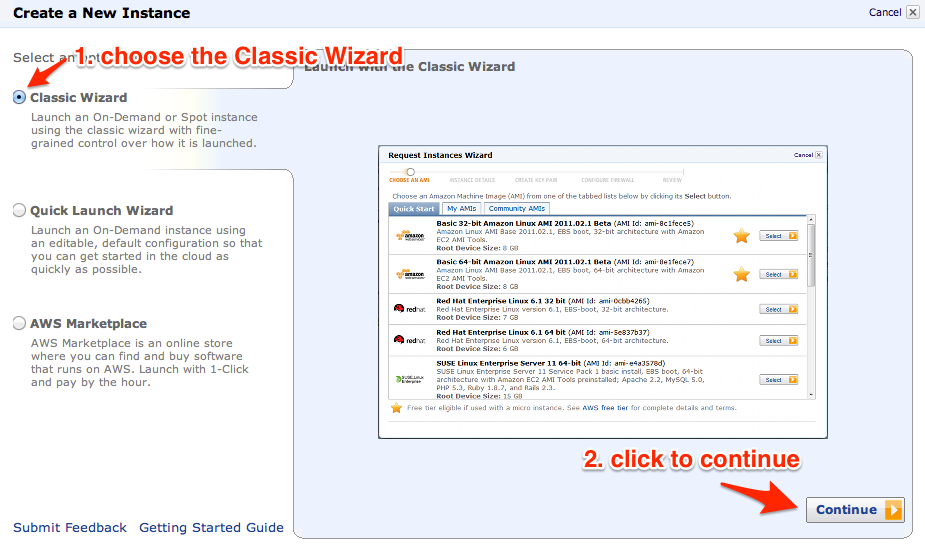
- In the wizard that pops up, choose the Classic Wizard and click the Continue button.
- If using our public AMI (recommended), select the "Community AMIs" tab, search for vrpipe, and select it from the list (currently its primary AMI ID is ami-fd849a89 in EU-Ireland, with different IDs for the copies in the other regions: ami-fd849a89 in Asia Pacific-Tokyo, ami-3c4e066e in Asia Pacific-Singapore, ami-f3b220c9 in Asia Pacific-Sydney, ami-3c4e066e in South America-Sao Paulo, ami-6e387d07 in US East-N. Virginia, ami-af7eec9f in US West-Oregon and ami-944c67d1 in US West-N. California):

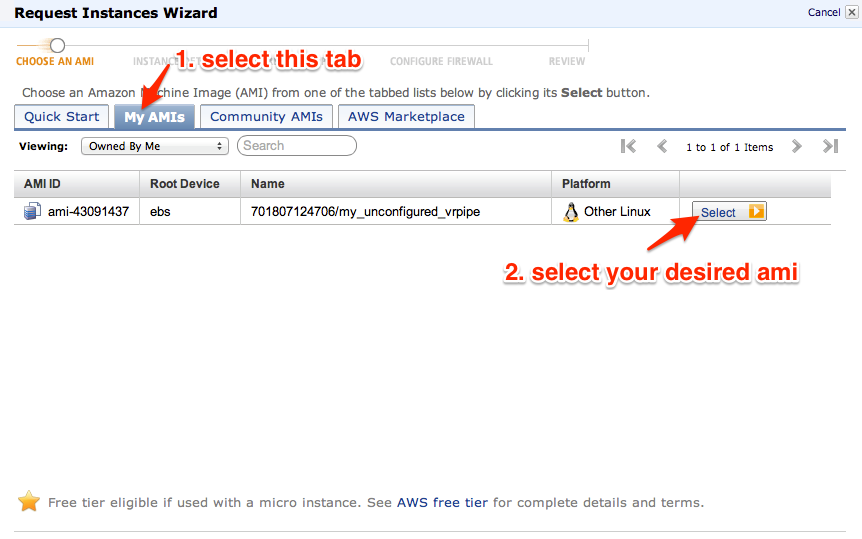
If using your own AMI, select the "My AMIs" tab and pick it from the list:
If you want to create your own AMI, start by basing it on an existing AMI such as one of those listed in the "Quick Start" tab (note, using an Amazon Linux AMI is strongly recommended, since it sets some things up that are not covered in the "Creating a VRPipe AMI" section below):

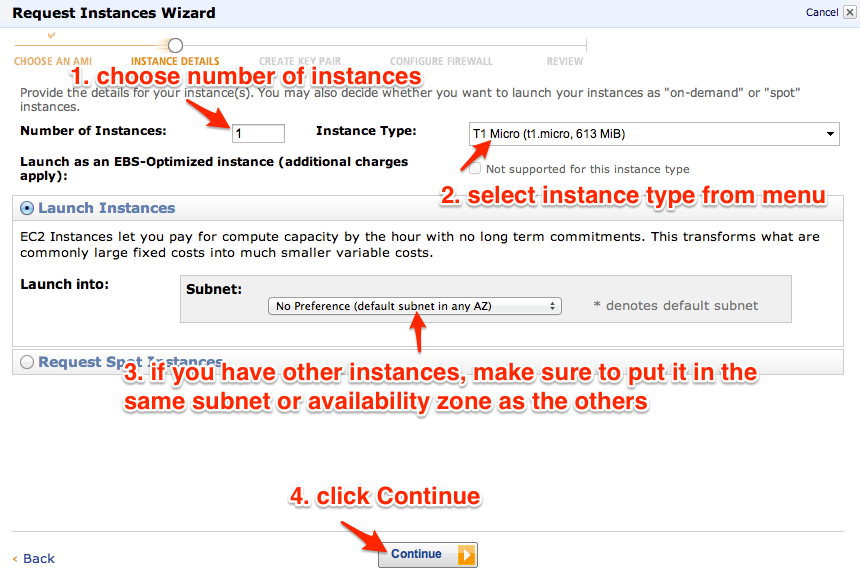
- Choose the number and type of instance. The type determines the performance of the machine, as explained in the drop-down menu. Make sure that if you have other instances you place this new instance into the same subnet or availability zone as them.
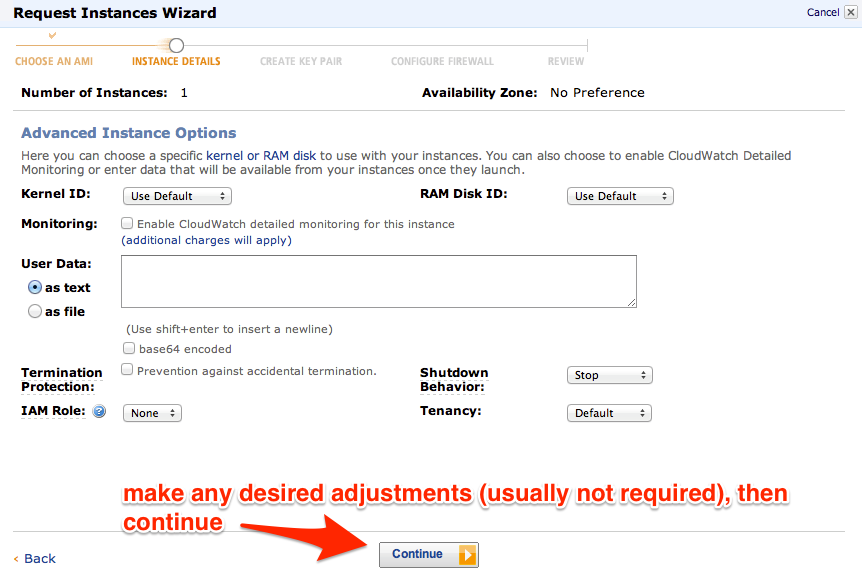
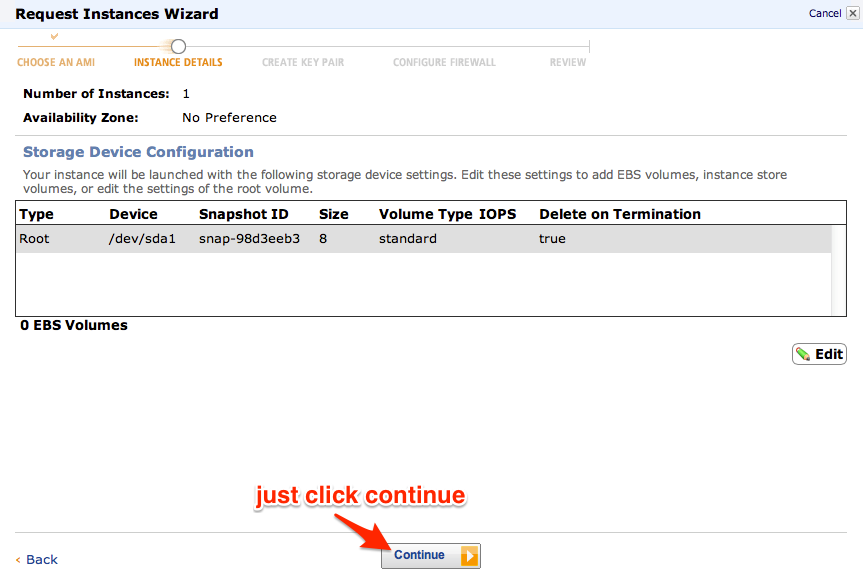
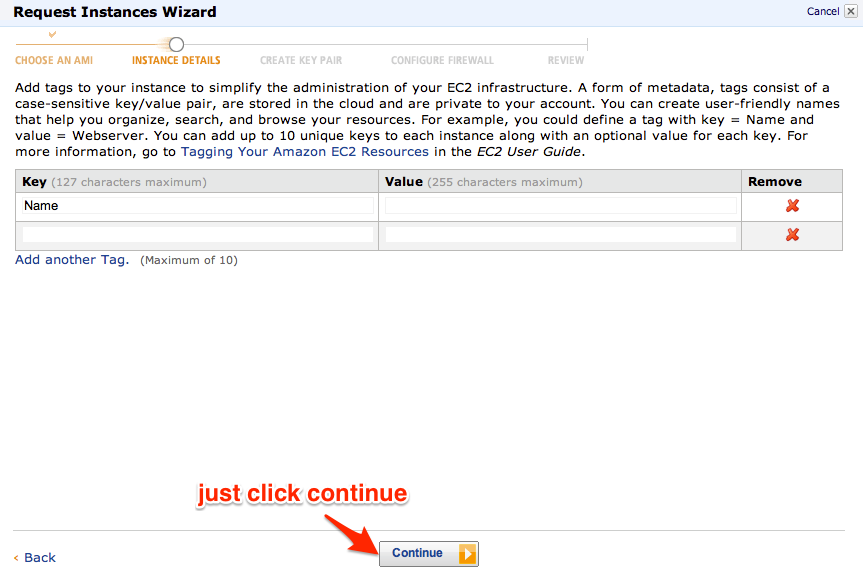
- You probably won't need to change anything on the next 3 screens of the wizard; just click Continue on them all.
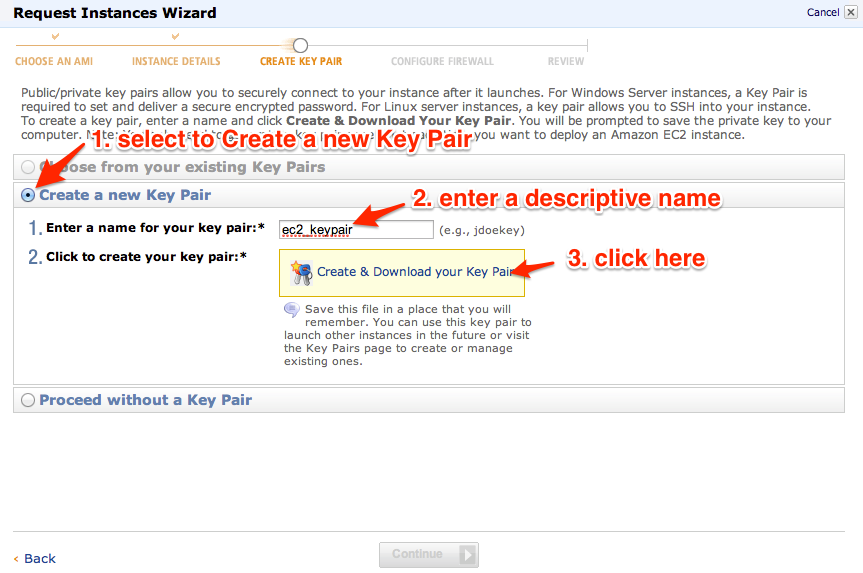
- If this is your first time launching an instance, choose 'Create a new Key Pair', enter a name for the pair, and click to download your key pair. Keep this file in a safe place; you'll need it later to ssh into your instance.
If you already have a Key Pair, select 'Choose from your existing Key Pairs' and select the one you made before.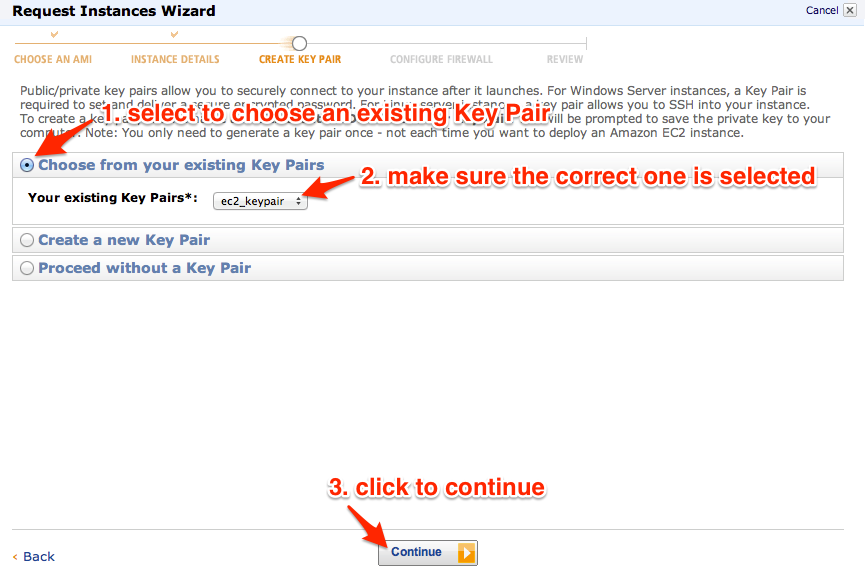
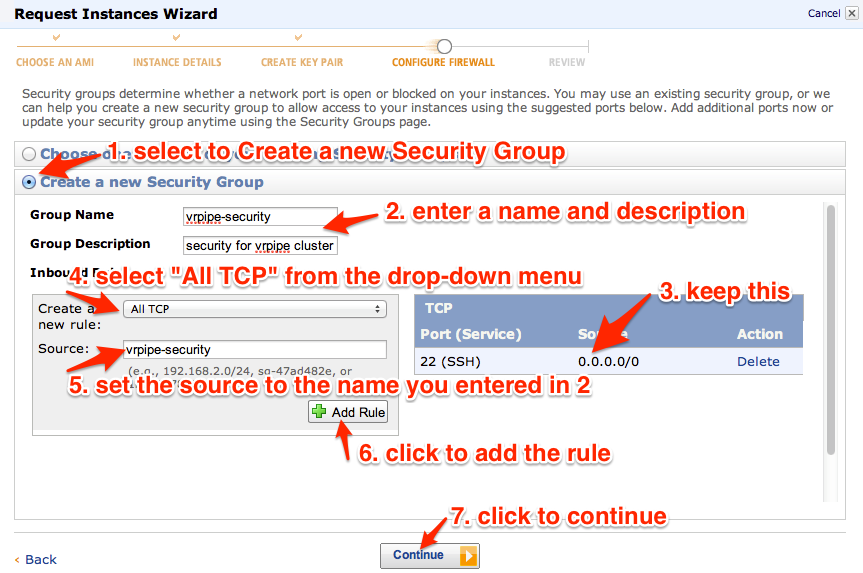
- If you've never created a Security Group before (or never created one suitable for a cluster of communicating instances), pick 'Create a new Security Group' and enter a meaningful name and description. Keep the default port 22 rule. Add a new rule that is 'All TCP' with a source of the name of the security group you're creating. This will mean that all instances you create that use this new security group can freely communicate with each other on any TCP port, while still not allowing any external access.
If you previously created a suitable Security Group, select 'Choose one or more of your existing Security Groups', make sure your desired group is selected, then click the Continue button.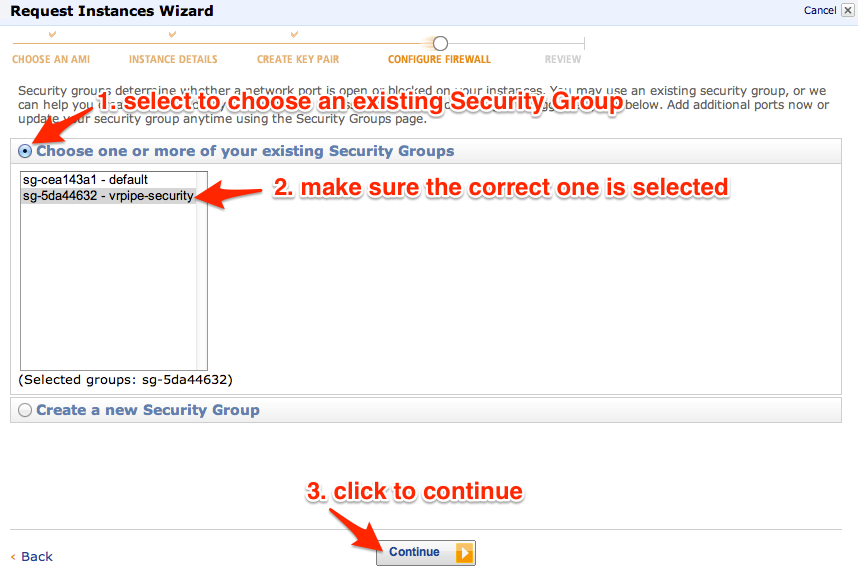
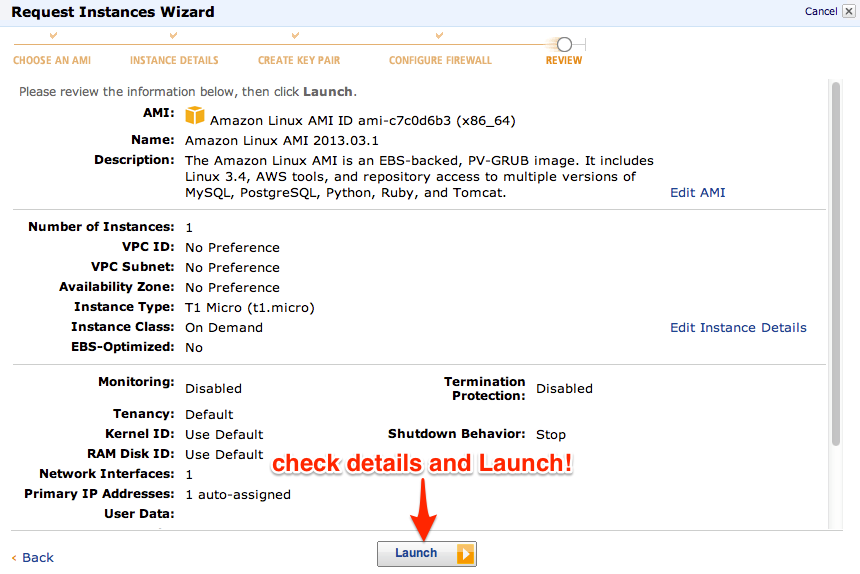
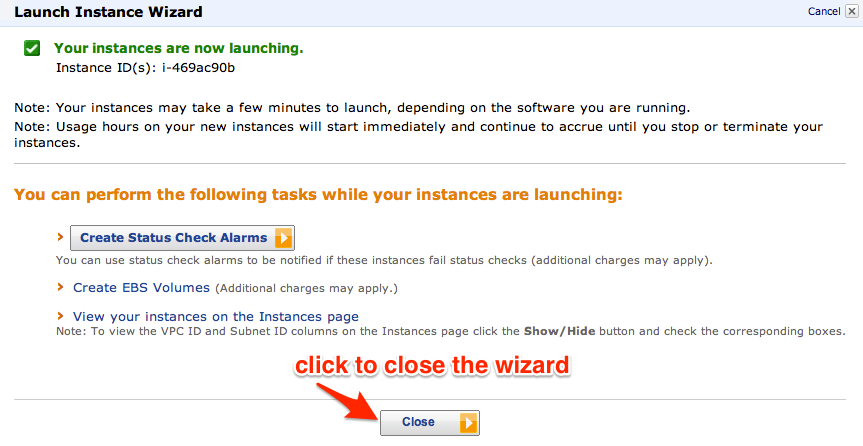
- Check the details and click the Launch button, then Close the wizard and wait for your new instance to become ready.
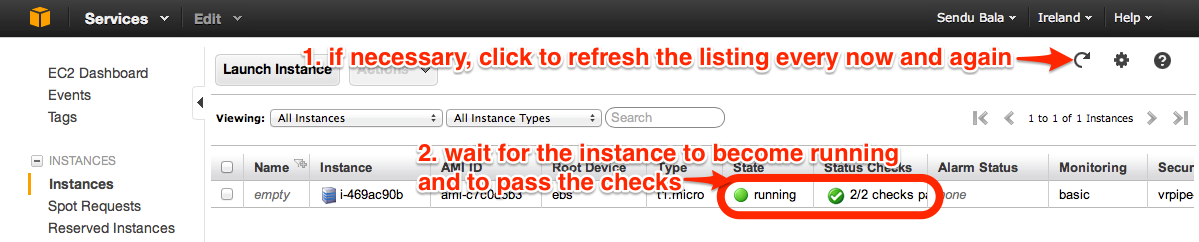
- Select the instance and scroll down the pane below to find the "Public DNS". Open a terminal on your local machine, go to the directory where you have stored your key pair from step 8, make sure it has restrictive permissions (eg.
chmod 600 ec2_keypair.pem), then log in:ssh -i ec2_keypair.pem ec2-user@<the public DNS>.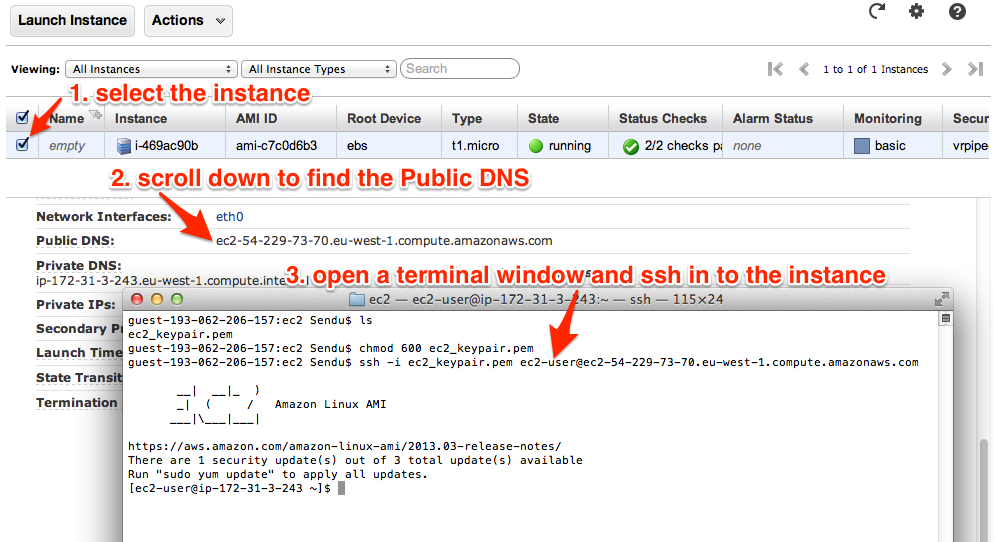
If you were using an existing VRPipe AMI, the guide is over: you're now logged in to your launched EC2 instance! See other guides on what to do next (ie. configure, install and use VRPipe). Don't forget to terminate your instance when you're done with it, as you will be charged for any running instances you have, even if you're not using them to do anything.
If you launched using a non-VRPipe AMI and want to create a VRPipe AMI now, continue with the next section.
Having followed the previous 11 steps, you should now have a terminal where you are logged in to a machine running your desired OS, but it doesn't yet have any of VRPipe's dependencies installed, nor other software packages we'll likely need. This is what we'll do next.
- Install the latest updates for your OS. When you first logged in you may have received a welcome message explaining how to do that.
sudo yum -y update - Set the correct local time zone for yourself by looking in /usr/share/zoneinfo for a place that matches your location.
sudo ln -sf /usr/share/zoneinfo/Europe/London /etc/localtime - Follow the Non-interactive SSH guide.
- Follow the normal Install VRPipe Dependencies guide.
- (optional) If you want to run your MySQL server on the same instance as the VRPipe server (not recommended, and you'll have to know how to administer it yourself; instead it is recommended that you use RDS), also install that as well:
sudo yum install -y mysql-server - Make available (but don't configure) SGE and Gluster, which are recommended for large-scale production use of VRPipe.
SGE:
cd $SRCDIR; mkdir sge; cd sge
wget http://arc.liv.ac.uk/downloads/SGE/releases/8.1.3/gridengine-8.1.3-1.el5.x86_64.rpm
wget http://arc.liv.ac.uk/downloads/SGE/releases/8.1.3/gridengine-execd-8.1.3-1.el5.x86_64.rpm
wget http://arc.liv.ac.uk/downloads/SGE/releases/8.1.3/gridengine-qmaster-8.1.3-1.el5.x86_64.rpm
wget http://arc.liv.ac.uk/downloads/SGE/releases/8.1.3/gridengine-qmon-8.1.3-1.el5.x86_64.rpm
sudo yum -y install *.rpm
echo export SGE_ROOT=/opt/sge/ >> ~/.bash_profile
Gluster:
cd $SRCDIR; mkdir gluster; cd gluster
wget http://download.gluster.org/pub/gluster/glusterfs/LATEST/RHEL/epel-6/x86_64/glusterfs-3.3.1-1.el6.x86_64.rpm
wget http://download.gluster.org/pub/gluster/glusterfs/LATEST/RHEL/epel-6/x86_64/glusterfs-fuse-3.3.1-1.el6.x86_64.rpm
wget http://download.gluster.org/pub/gluster/glusterfs/LATEST/RHEL/epel-6/x86_64/glusterfs-geo-replication-3.3.1-1.el6.x86_64.rpm
wget http://download.gluster.org/pub/gluster/glusterfs/LATEST/RHEL/epel-6/x86_64/glusterfs-server-3.3.1-1.el6.x86_64.rpm
sudo yum install -y *.rpm
sudo yum install -y xfsprogs fuse fuse-libs - Optionally, install FDT to allow fast data transfers over SSH to and from the machine running VRPipe.
cd(go to ec2-user's home directory)
wget http://monalisa.cern.ch/FDT/lib/fdt.jar - Now that everything you need is installed, go ahead and create the AMI.