-
Notifications
You must be signed in to change notification settings - Fork 14
GettingStarted: SAMD21 Xplained Pro
1. Prerequisites
To learn how to install this module, see HowTo - Install this module.
2. Prepare the board
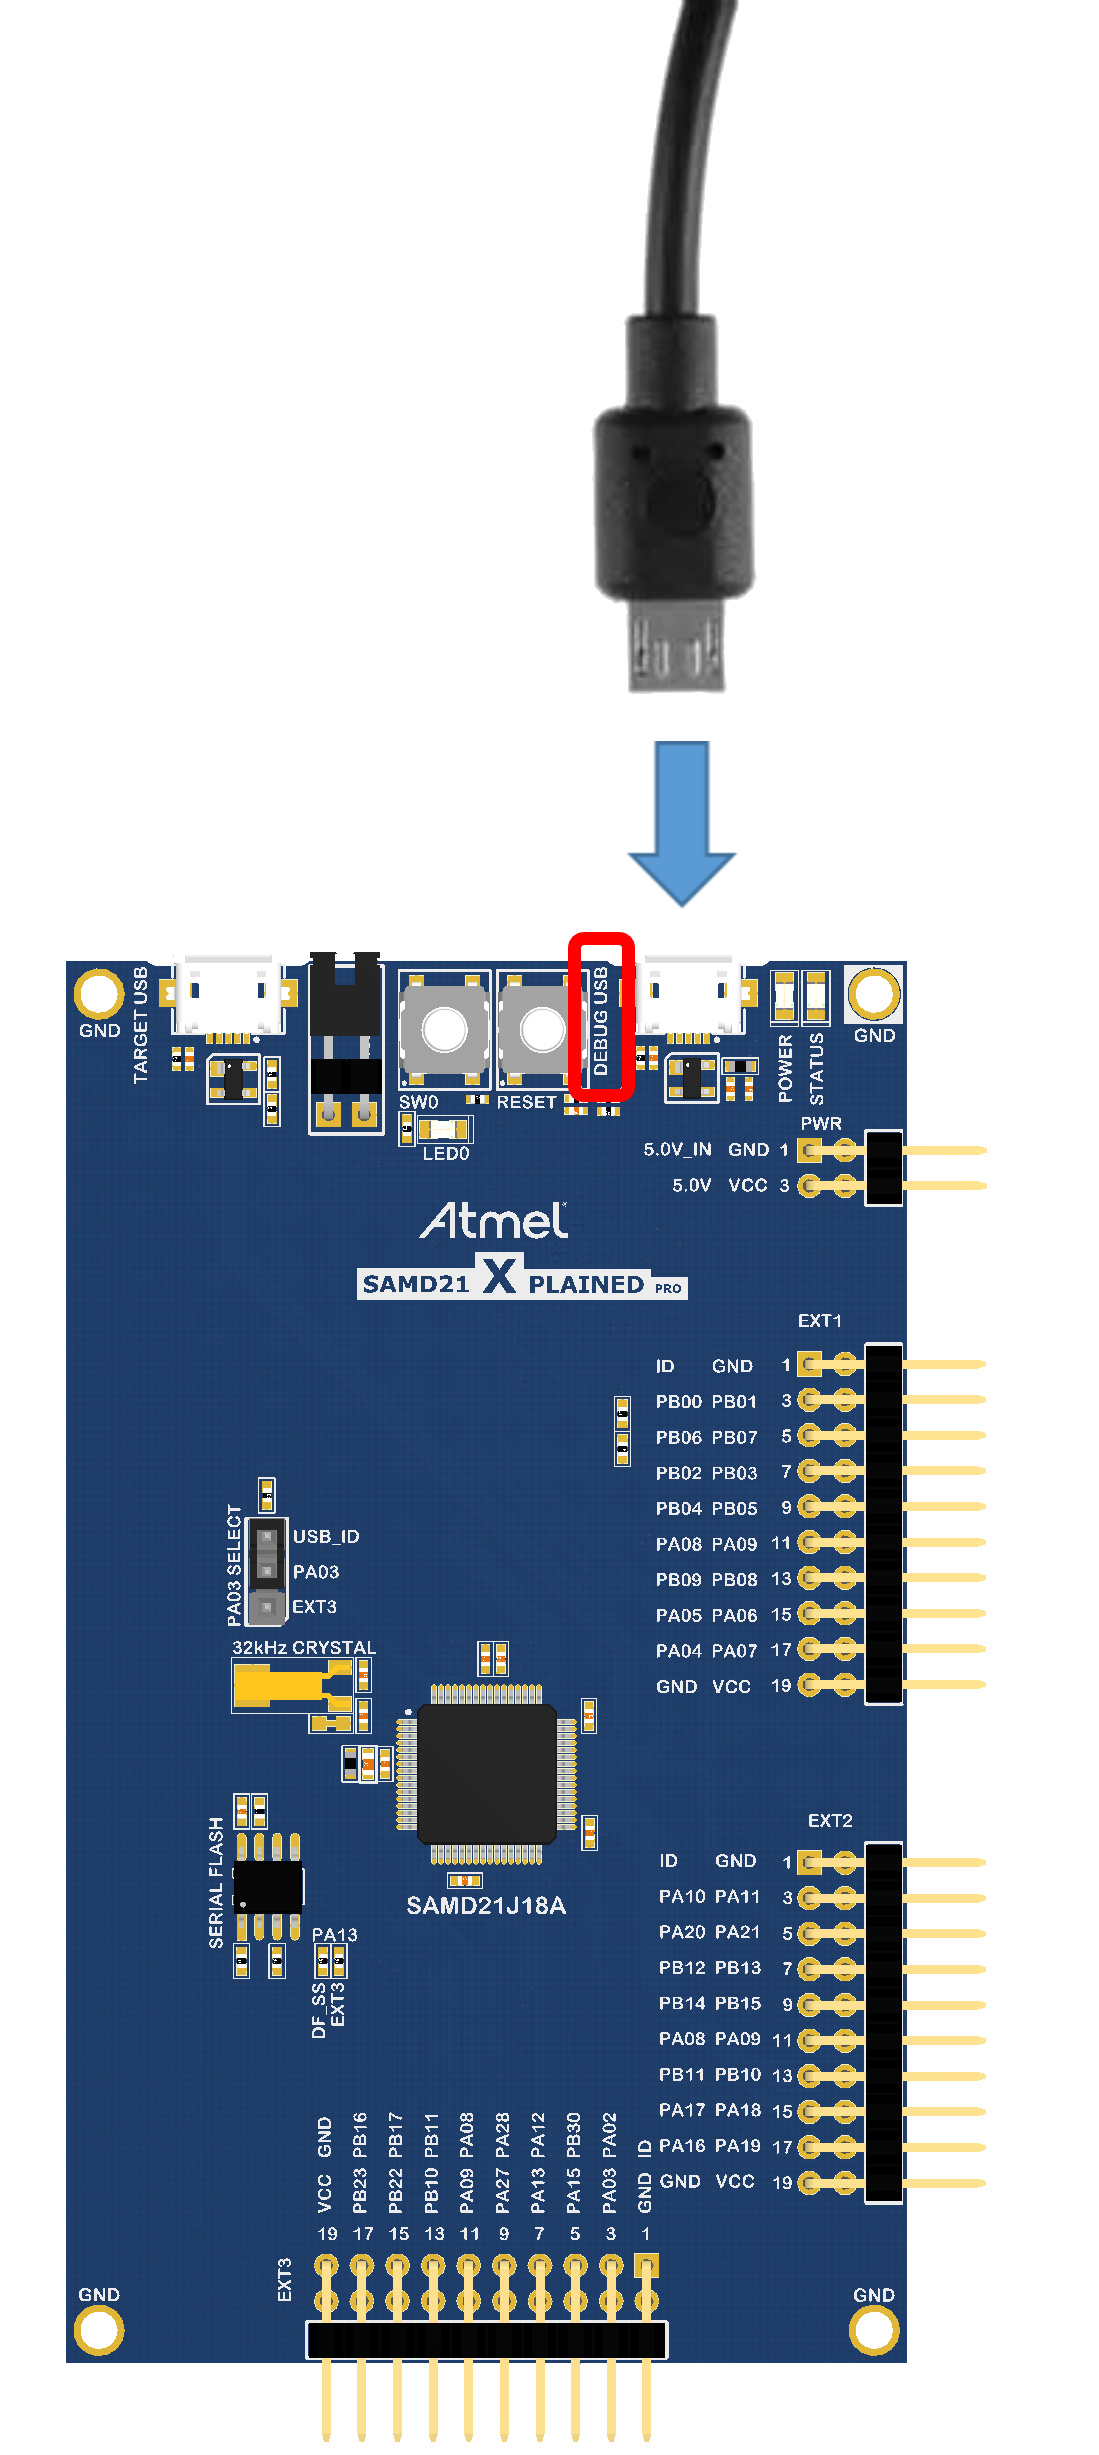
2.1. Connect USB cable
Connect a micro USB cable from host computer to the USB Debug port of the kit, as described below:

2.2. Burn bootloader

2.3. Compile and upload Blink sketch
Select blink example coming with SAMD21-XPRO package, this will open a new IDE window.

Verify and Upload on board the sketch binary. At this point, you should see the board LED blinking.
3. SAMD21 Xplained Pro Arduino variant pinout
The onboard LED (LED0) can be used via various constants: PIN_LED_13, PIN_LED, PIN_LED0, LED_BUILTIN or D2
The onboard push button (SW0) can be used via various constants: PIN_BUTTON, PIN_SW0 or D3

4. Moving forward
You can now either select an example from the ones listed in Examples submenu or create your own sketch/application.
