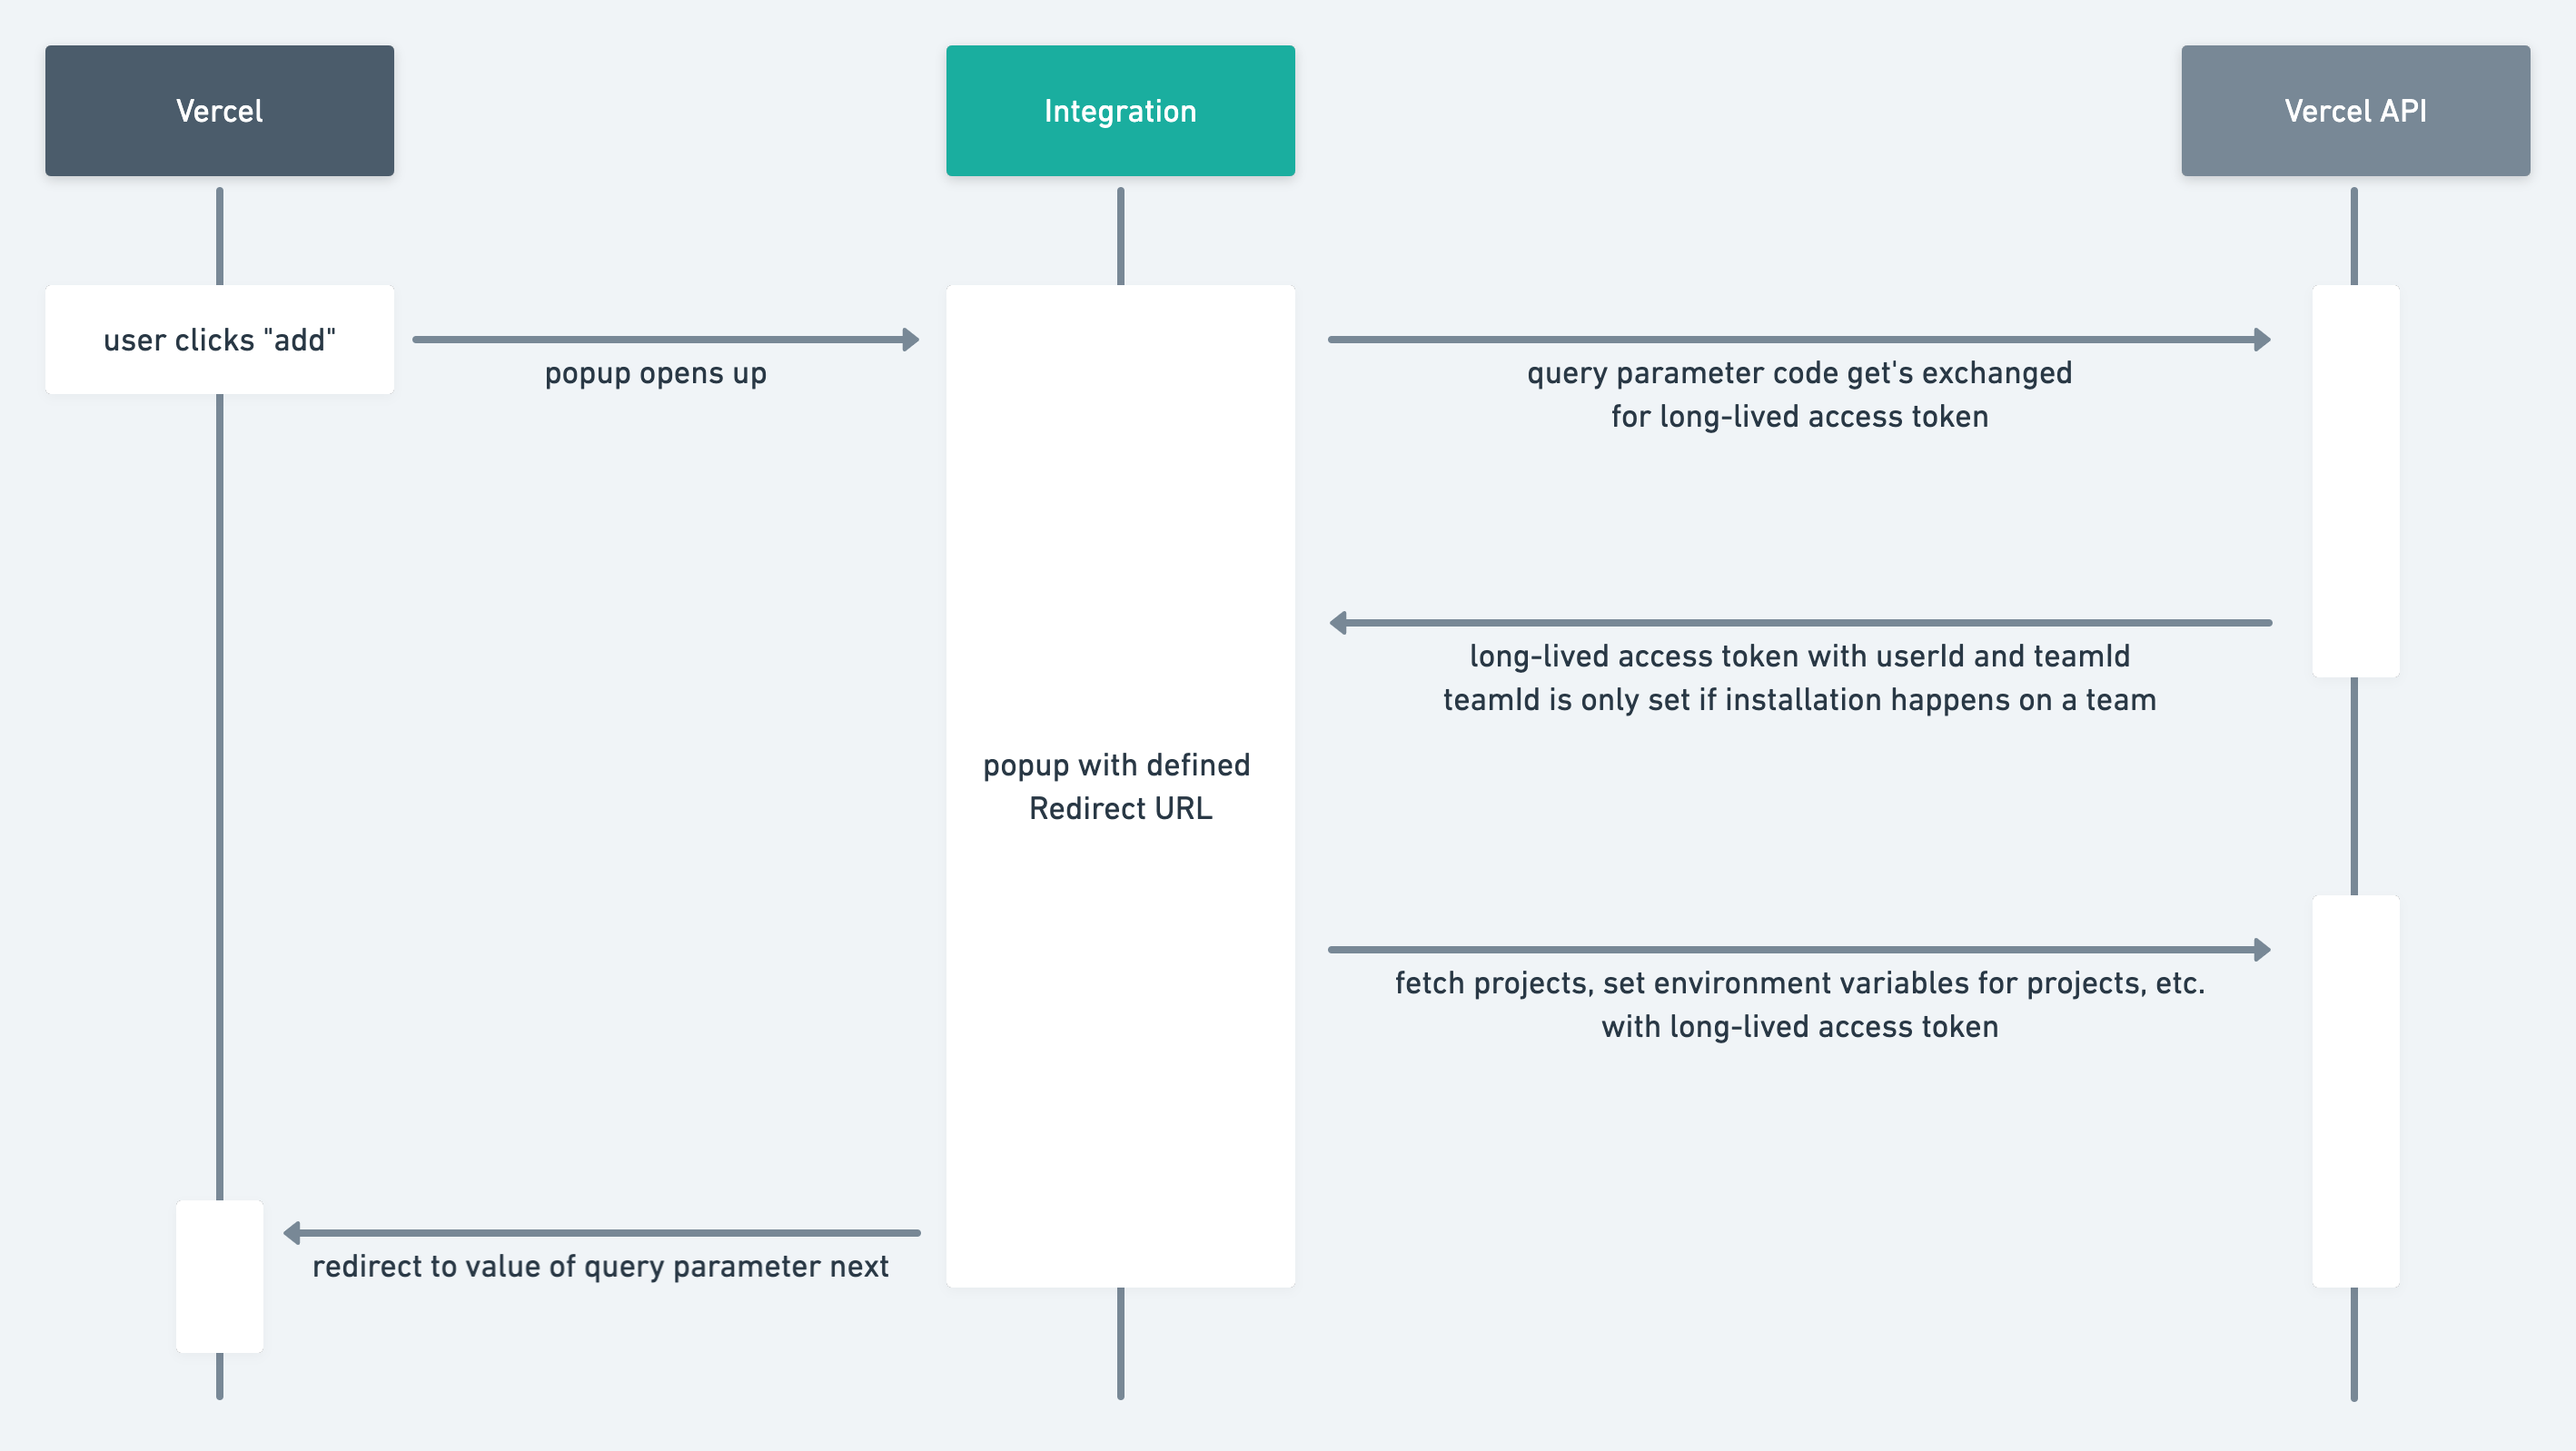
This app is an example integration, built with Next.js.
It shows:
- how to exchange the
codefor anaccess_tokento interact with the API - how to use the API to display all projects for the current user or team
-
Create a new integration on the integration console
-
Set the Redirect URL to
http://localhost:3000/callback -
Set the environment variables:
cp .env.local.example .env.local
Set the CLIENT_ID and CLIENT_SECRET accordingly to the values you see in the integration console if you edit your integration.
- Install all dependencies
npm install
- Start the app
npm run dev
- Add it to a project
Now your example integration is running on http://localhost:3000. Click on "View in Marketplace" to see your integration with all details like others will see it. You're now able to add your integration to a project. Once you click "add" you see a popup that will use the defined Redirect URL http://localhost:3000/callback. The integration is now installed.
- The user clicks "add" and selects the scope
- The user sees the callback popup with your defined Redirect URL
- The Redirect URL will be called with query parameters that we can use:
code: The authorization code to receive anaccess_tokenin order to interact with the APIteamId: The id of the team (only provided if the integration gets installed on a team)configurationId: The id of the installation (you usually want to store this information)next: The URL we're redirecting if the setup is done
- Once the user sees the page
/setupwe exchange the providedcodefor anaccess_token. See the docs for exchanging code for an access token - After the
codewas exchanged, we can use theaccess_tokenfor our calls to the Vercel API. See the docs for available endpoints. In this case we're querying the Projects endpoint to get a list of all projects for the user or the team - The user sees a list of projects. This would be the step to provide additional information and allow the user to link projects to your own resources.
- The user clicks on "Redirect me back to Vercel" to close the popup and complete the installation on Vercel. In your real integration, this should be done automatically after you collected all information you need, to save the user some clicks.
Important note:
Please make sure, that you provide the teamId as a query parameter while interacting with the API. To determine if you have to add a teamId to API calls, see the response after exchanging the code for an access_token. See the docs for accessing resources owned by a team.
