This plugin allows you to use your own mapbox style as a base map in windy.com
- Go to https://www.mapbox.com/ and register a profile
- Go to https://studio.mapbox.com/ and create your map style
- Once you are finished in the style editor, press Publish
- Go to https://www.windy.com/
- From the menu press "install windy plugin"
This repository acts as an documentation, playground and boilerplate for your own Windy plugin.
Therefore always fork this repository before editing it.
Plugins are written in Javascript and published as npm package, so you already know how to create them
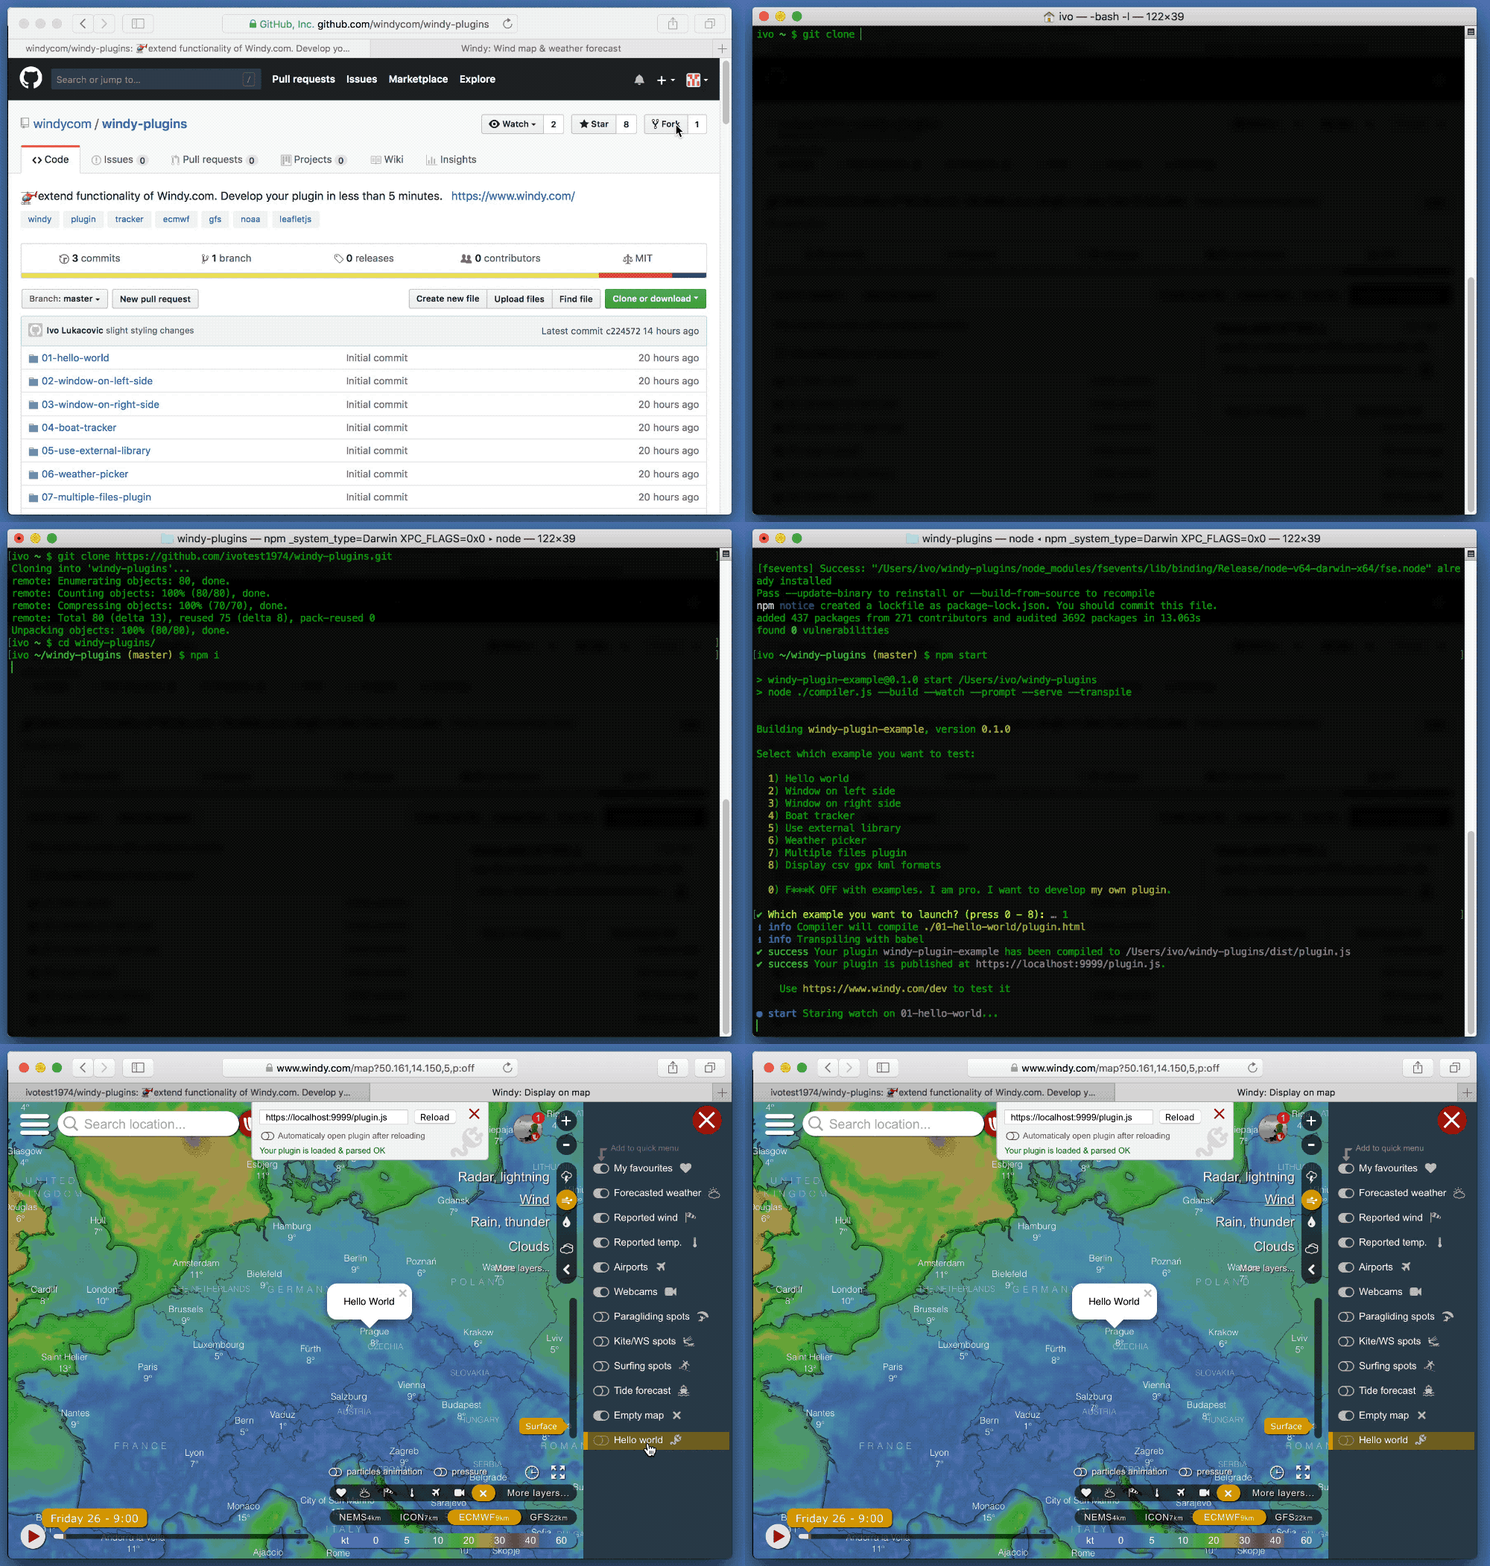
Fork this repository and then clone it
git clone https://github.com/yourUsername/windy-plugins
cd windy-plugins
npm i
npm start
Now open your browser browser at https://localhost:9999/plugin.js to accept self signed SSL certificate.
Then open your browser at www.windy.com/dev to test your plugin.
If it fails, make sure that your plugin is correctly built and accessible with your browser at https://localhost:9999/plugin.js.
- Hello World
- Left side window
- Right side window
- Boat tracker
- Loading external library
- Use weather picker
- Working with multiple files
- Display CSV, GPX, KML, WKT and other
- Interpolate weather values from a map
- Loading data from Windy API
- How Windy Plugin work
- Windy API documentation
- Leaflet 0.7.7 documentation
- List of Leaflet Plugins
- Windy Plugins technical forum
Our custom Windy Plugin Compiler does all the job for you. Just run npm start to launch it or npm run start-dev to skip beginner's prompt.
- Make sure, that your
package.jsonis updated, and that:- name, is unique name of your plugin
- description, describes what your plugin does
- author and repository reflects your name and where the plugin hosted is
- Remove this
README.mdand put there few words about your plugin (and maybe some screenshot if you want). The text from README file will be used in our planned plugins gallery. - Publish your plugin as npm package by
npm publish. (If you are not familiar with npm, create and account and login: https://docs.npmjs.com/creating-a-new-npm-user-account.) - Test your published npm package on Windy's Plugin page
- Let us know in our community about your new achievement.
- Once you are satisfied with your plugin, you can request permission for it to be approved. Your plugin will then be listed in the "windy.com/plugins" gallery, and you will be able to use the url query string.
- Commit your work and pull your repository back to GitHub. Rename your repository to reflect name of your plugin.
It is strictly prohibited to use plugin to:
- Modify user's setting without his consent
- Download any of user's settings, favorites or location to your server
- Download any meteorological data from Windy to your own server or use them in any other scope than inside your plugin
- Do any action that would harm our privacy policy
We prepare Windy Enterprise project, that will enable to
- Use private plugins (not published publicly)
- Limit access to your data just to your invited users
- Let us know if you want to be informed about this project
- While providing coordinates to Leaflet can be done via object
{ lat, lng }with lng property, Windy supports{ lat, lon }with lon property. - Using undocumented functions of Windy API can break your plugin, when we decide to upgrade our codes. If you miss something, rather let us know here and ask us to document and expose other features.
Drop a line in our Windy Plugins section of our Community forum.
- Initial release
- Extend Windy API on a basis users requests
- Create gallery of the most useful plugins
- Create system so anyone can publish its own forecast/climatological model on Windy
- 0.5.0
- Remove ECMWF from
plugin-data-loader- ECMWF fortunately added again!
- Remove ECMWF from
- 0.4.0
- Added
plugin-data-loaderto the Plugins API
- Added
- 0.3.0
- Examples moved to examples dir
- 0.2.0
- Fixed wrong examples
- 0.1.1
- Initial version of this repo
This is default readme - please do not remove this line


