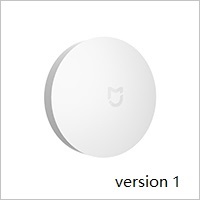
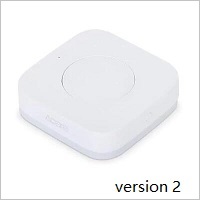
Homebridge dynamic platform plugin for Xiaomi Aqara Switches with morse code functionality
This homebridge plugin exposes Xiaomi Aqara switches setted in config.json as switch accessory to HomeKit with morse code functionality!
Well, i'm using this switch for activating/deactivating my house alarm. Normally i need to single click the button for activating the alarm and double click for deactivating. But this seems not to be secure. Because of this, i have created this plugin to give these switches a special functionality!.
In order to work without any problems, this plugin uses the miio module for discovering and storing the gateway information in your persist folder. Because of this, it is not temporarely important to set the ip adress and/or token in the config.json file. But it is recommended if you have multiple gateways to choose a specific gateway!
After Homebridge has been installed:
sudo npm install -g homebridge-xiaomi-alarmswitch@latest
To use the plugin, add the following basic configuration to your config.json that configures homebridge in the platforms section:
{
  "platform": "AlarmSwitch",
}
After you've saved your config.json you can go ahead and launch homebridge and observe the logs.
With the above configuration homebridge will print the following logs:
[WARN] No ip address and/or no token could be found in config, looking in storage..
[WARN] No gateway information in storage, requesting...
[INFO] Found new gateway, storing gateway information...
[WARN] Can not find any switches in config! Searching...
[INFO] Connected to Gateway lumi.gateway.v3 [miio:12345678]. Searching devices...
[INFO] Found 1 switch(es)!
[INFO] Please add the Device ID(s) from the switch(es) you want to control in your config.json and restart homebridge!
[INFO] (0) Device ID: 123a45678bc910
**************************************************************

    Example config.json

    {
      "platform":"AlarmSwitch",
      "name":"Alarm",
      "firstRun":false,
      "ip":"192.168.1.1",
      "token":"12345678910abcdefghijklmnop",
      "switches":{
          "123a45678bc910":{
               "type": 1,
               "disable":false,
               "resetTimer":10,
               "morseCode": [2,1,2]
          }
      }
    }

**************************************************************
[INFO] Closing connection...
Now, the plugin have stored all necessary information into your persist folder. To expose your switch, just copy the example config from your output and paste it into your config.json. If you want to enhance multiple switches, try the Advanced config.json below.
{
 "bridge": {
     ...
 },
 "platforms": [
   {
     "platform":"AlarmSwitch",
     "name":"Alarm Switch",
     "firstRun":false,
     "ip":"192.168.1.1",
     "token":"abcdefghijklmon123456789",
     "switches":{
       "123a45678bc901":{
         "type":1,
         "disable":false,
         "resetTimer":10,
         "morseCode": [1,1,2]
       },
       "124a45678bc902":{
         "type":2,
         "disable":false,
         "resetTimer":15,
         "morseCode": [2,1,1]
       }
     }
   }
 ]
}
See Example Config for more details.
- You can give every switch a value for a single click and for a double click
- The long click acts only for confirmation and checking of the morse code OR turning the switch/alarm on if the morseCode was not given or it was given wrong
- Example: morseCode = [2,1,2] (see example-config above), this means that after entering the needed clicks in right order (in this example it is double click, single click, double click) and confirming it with a "long click", the switch/alarm will turn off, after entering a "long click" again, the switch/alarm will turn on.
- Morse code click types: 1 = Single Click ; 2 = Double Click
There are 3 types of accessories which can be assigned to the switches in the config.json.
- Type 1: Exposes an ALARM accessory to HomeKit
- Type 2: Exposes an VIRTUAL SWITCH accessory to HomeKit
- Type 3: Exposes an PROGRAMMABLE SWITCH accessory to HomeKit
Note: All types except type 3 are directly connected with the gateway alarm system. That means, if you "long click" the button you have assigned in the config.json the alarm will trigger on. If you give the morse code setted in config.json in right order and confirm it with a long click the alarm will trigger off.
Type 3 (Programmable switch) uses the morse functionality, too. But it is not connected to the gateway alarm sytem. You can assign the single taps and double taps different automations or scenes in Apple HomeKit. But keep in mind, to activate the event on "single tap" you have to "long lick" the switch and for activating the "double tap" event you have to give the morse code and confirm it with a "long click". The advantage of type 3 is, it's up to you what you want to control with it.
| Attributes | Required | Usage |
|---|---|---|
| platform | Yes | Must be AlarmSwitch |
| name | no | Name for the switch. Will be used as part of the accessory name. |
| ip | no | IP adresse from the Gateway (if no setted in config, the plugin will automatically find the ip) |
| token | no | Token from the Gateway (if no setted in config, the plugin will automatically find the token) |
| firstRun | no | Manually invokes the "First run" function to list all connected devices and an example config in your terminal |
| switches.id | Yes | Device ID from the switch(es) that you want to control with this plugin |
| switches.type | no | Defines which type of accessory should be exposed to HomeKit (1 = Alarm, 2 = Virtual Switch, 3 = Programmable Switch, default: 1) |
| switches.disable | no | If disable = true, the switch will be removed from HomeKit (Default: false) |
| switches.resetTimer | no | Timer (in seconds) for resetting the switch if no input is detected (Default: 10) |
| switches.morseCode | no | Order of click types (1 = single click, 2 = double click) which is needed to be clicked in right order to deactivate switch/alarm |
See Example Config for more details.
This plugin has been verified to work with the following apps on iOS 11.3.1:
- Apple Home
- All 3rd party apps like Elgato Eve etc.
Issues ///
TODO
- "Learn Code" Function (partial)
- Prorammable switch
- Option to set also the order of clicks
- Expose automatically all available switches
- Dynamically remove/add switches (partial)
You can contribute to this homebridge plugin in following ways:
- Report issues and help verify fixes as they are checked in.
- Review the source code changes.
- Contribute bug fixes.
- Contribute changes to extend the capabilities
Pull requests are accepted.


