We offer a fully hosted web version of Obstracts which includes many additional features over those in this codebase. You can find out more about the web version here.

Obstracts takes a blog ATOM or RSS feed and converts into structured threat intelligence.
Organisations subscribe to lots of blogs for security information. These blogs contain interesting indicators of malicious activity (e.g. malicious URL).
To help automate the extraction of this information, Obstracts automatically downloads blog articles and extracts indicators for viewing to a user.
It works at a high level like so:
- A feed is added to Obstracts by user (selecting profile to be used)
- Obstracts uses history4feed as a microservice to handle the download and storage of posts.
- The HTML from history4feed for each blog post is converted to markdown using file2txt in
htmlmode - The markdown is run through txt2stix where txt2stix pattern extractions/whitelists/aliases are run based on staff defined profile
- STIX bundles are generated for each post of the blog, and stored in an ArangoDB database called
obstracts_databaseand Collections names matching the blog - A user can access the bundle data or specific objects in the bundle via the API
- As new posts are added to remote blogs, user makes request to update blog and these are requested by history4feed
Obstracts requires history4feed to download and store blog posts.
You'll need to set the location of history4feed later in the Obstracts .env file.
If you are running history4feed locally, be sure to set HISTORY4FEED_URL='http://host.docker.internal:8002/' in the .env file otherwise you will run into networking errors.
# clone the latest code
git clone https://github.com/muchdogesec/obstractsObstracts has various settings that are defined in an .env file.
To create one using the default settings:
cp .env.example .envsudo docker compose buildsudo docker compose upThe webserver (Django) should now be running on: http://127.0.0.1:8001/
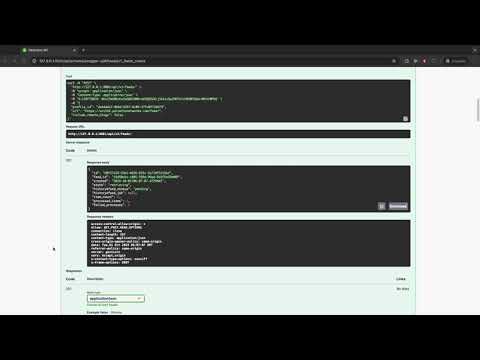
You can access the Swagger UI for the API in a browser at: http://127.0.0.1:8001/api/schema/swagger-ui/
Note, this script will not install an ArangoDB instance.
If you're new to ArangoDB, you can install the community edition quickly by following the instructions here.
If you are running ArangoDB locally, be sure to set ARANGODB_HOST_URL="http://localhost:8529/" in the .env file otherwise you will run into networking errors.
The script will automatically create a database called obstracts_database when the container is spun up (if it does not exist).
For each blog added, two new collections will be created in the format
<FEED_NAME>_<FEED_ID>-<COLLECTION_TYPE>_collection
e.g.
graham_cluley_9288374-0298740-94875-vertex_collectiongraham_cluley_9288374-0298740-94875-edge_collection
The webserver is Django.
To create an admin user in Django
sudo docker-compose run django python manage.py createsuperuserYou can access the django admin UI at:
Note, if you intend on using this in production, you should also modify the variables in the .env file for POSTGRES_DB, POSTGRES_USER, POSTGRES_PASS, DJANGO_SECRET and DEBUG (to False)
Obstracts is made up of three core external components that support most of its functionality.
At a high-level the Obstracts pipeline looks like this: https://miro.com/app/board/uXjVKD2mg_0=/
Generally if you want to improve how Obstracts performs functionality, you should address the changes in;
- history4feed: responsible for downloading the blog posts, including the historical archive, and keep posts updated
- file2txt: converts the HTML post content into a markdown file (which is used to extract data from)
- txt2stix: turns the markdown file into STIX objects
- stix2arango: manages the logic to insert the STIX objects into the database
For anything else, then the Obstracts codebase is where you need to be :)