简体中文 | English
This open-source demo shows how to use some APIs of the TRTC SDK to help you better understand the APIs and use them to implement some basic TRTC features.
This demo covers the following features (click to view the details of a feature):
- Basic Features
- Advanced Features
- String-type Room IDs
- Video Quality Setting
- Audio Quality Setting
- Rendering Control
- Network Speed Testing
- CDN Publishing
- Custom Video Capturing & Rendering
- Audio Effect Setting
- Background Music Setting
- Local Video Sharing
- Local Video Recording
- Multiple Room Entry
- SEI Message Receiving/Sending
- Room Switching
- Cross-Room Competition
- Third-Party Beauty Filters
Note: for clarity purposes, the naming of folders in the project may differ slightly from a standard Android Studio project in terms of letter case.
- Android 4.1 (SDK API level 16) or above; Android 5.0 (SDK API level 21) or above is recommended
- Android Studio 3.5 or above
- Devices with Android 5.0 or above
You have signed up for a Tencent Cloud account and completed identity verification.
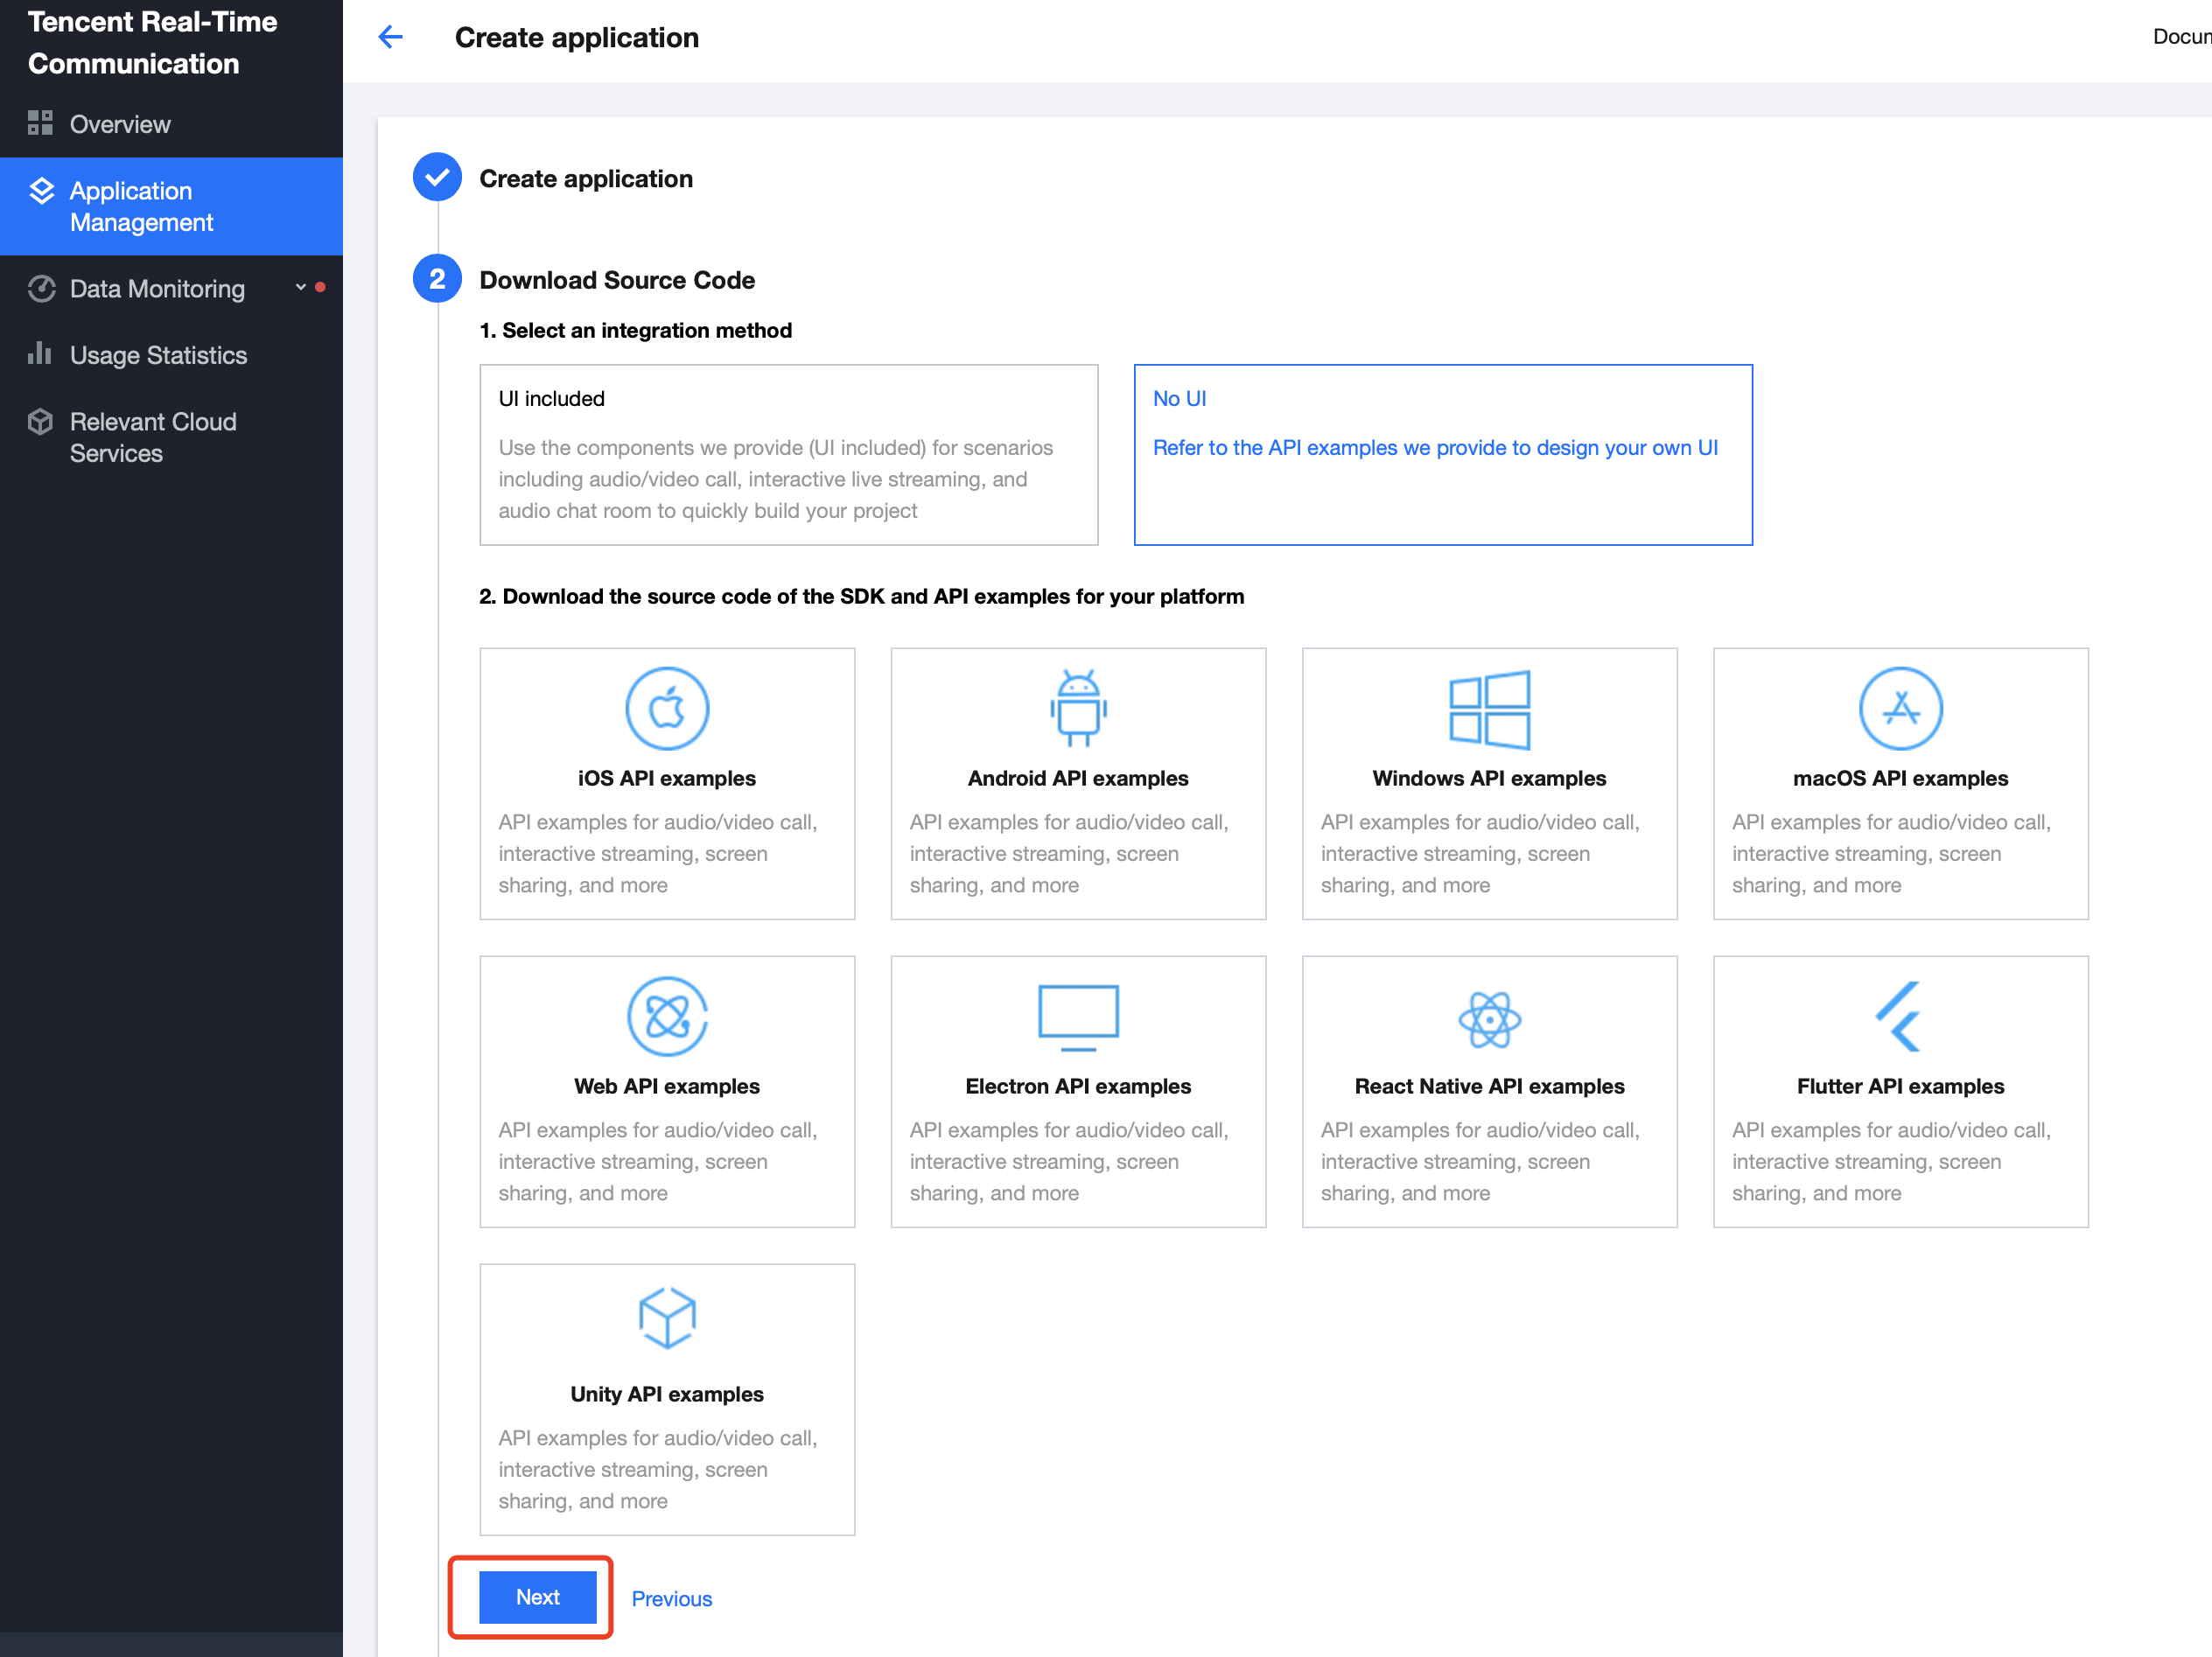
- Log in to the TRTC console and select Application Management > Create application.
- Enter an application name such as
TestTRTC, and click Next.
SDKAppID and Secret key.
- Open the demo project
TRTC-API-Examplewith Android Studio (3.5 or above). - Find and open
TRTC-API-Example/Debug/src/main/java/com/tencent/trtc/debug/GenerateTestUserSig.java. - Set parameters in
GenerateTestUserSig.javaas follows:
SDKAPPID:PLACEHOLDERby default. Set it to the actualSDKAppID.SECRETKEY: left empty by default. Set it to the actual key.
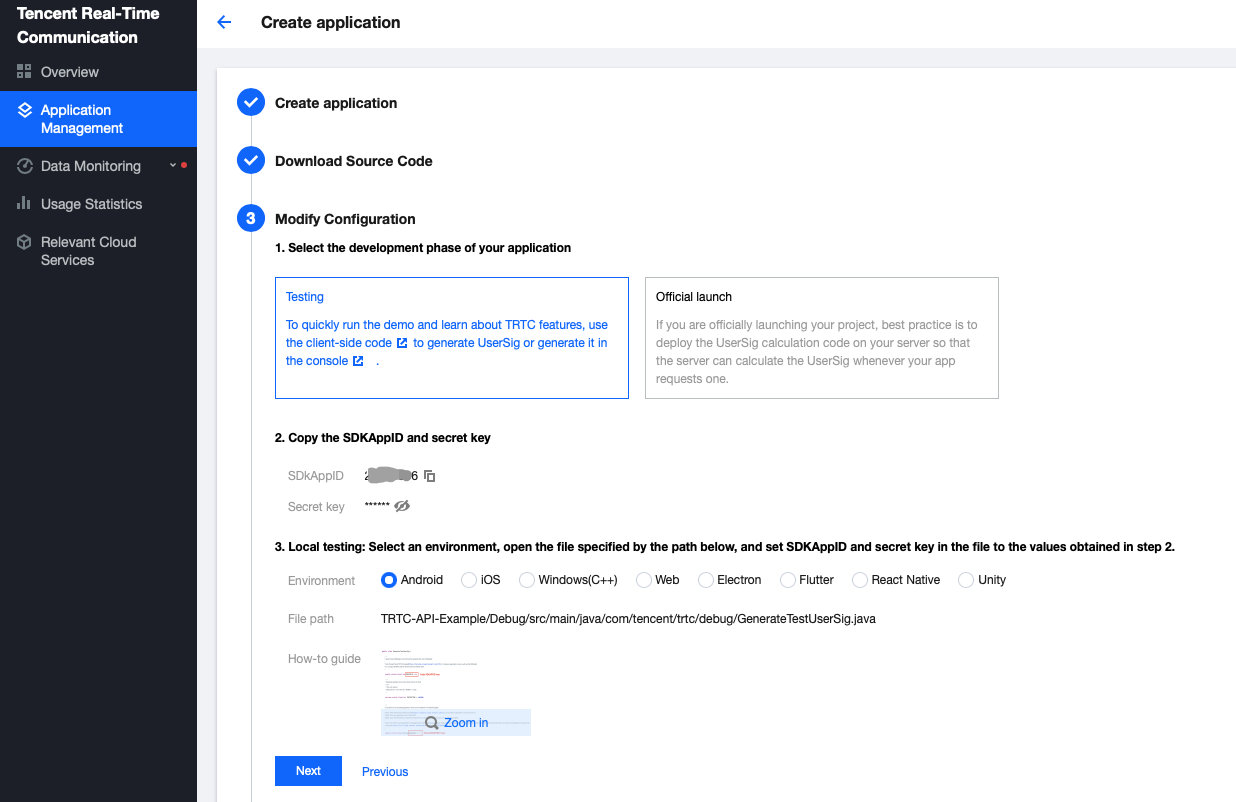
- Return to the TRTC console and click Next.
- Click Return to Overview Page.
!The method for generating
UserSigdescribed in this document involves configuringSECRETKEYin client code. In this method,SECRETKEYmay be easily decompiled and reversed, and if your key is disclosed, attackers can steal your Tencent Cloud traffic. Therefore, this method is suitable only for the local execution and debugging of the demo. The correctUserSigdistribution method is to integrate the calculation code ofUserSiginto your server and provide an application-oriented API. WhenUserSigis needed, your application can make a request to the business server for dynamicUserSig. For more information, please see How to Calculate UserSig.
To use CDN services, which are needed for co-anchoring, CDN playback, etc., you need to configure three live streaming parameters.
For detailed instructions, see CDN Relayed Live Streaming.
You can use JCenter for automatic loading or manually download the AAR file and import it to your project. The demo uses the first method by default.
The TRTC SDK has been released to the JCenter repository. You can use Gradle to download and update it automatically.
Use Android Studio to open your project and modify the app/build.gradle file in three simple steps to integrate the SDK into your project, as shown below:
- Add the TRTC SDK dependencies to
dependencies.
- Run the following command if you use the 3.x version of com.android.tools.build:gradle.
dependencies {
    implementation 'com.tencent.liteav:LiteAVSDK_TRTC:latest.release'
}
- Run the following command if you use the 2.x version of com.android.tools.build:gradle.
dependencies {
    compile 'com.tencent.liteav:LiteAVSDK_TRTC:latest.release'
}
- In
defaultConfig, specify the CPU architecture to be used by the application.
defaultConfig {
    ndk {
        abiFilters "armeabi-v7a", "arm64-v8a"
    }
}
- Click Sync Now to automatically download and integrate the SDK into your project.
If you have difficulty accessing JCenter, you can manually download the SDK and integrate it into your project.
- Download the latest version of the TRTC SDK.
- Copy the downloaded AAR file to the app/libs directory of your project.
- Add flatDir to
build.gradleunder the project’s root directory and specify a local path for the repository.
...
allprojects {
    repositories {
        flatDir {
            dirs 'libs'
            dirs project(':app').file('libs')
        }
    ...
    }
}
...
- Add code in
app/build.gradleto import the AAR file.
dependencies {
    ...
    compile(name: 'LiteAVSDK_TRTC_xxx', ext: 'aar') // `xxx` is the version number of the decompressed SDK
    ...
}
- In
defaultConfigofapp/build.gradle, specify the CPU architecture to be used by the application.
defaultConfig {
    ndk {
        abiFilters "armeabi-v7a", "arm64-v8a"
    }
}
- Click Sync Now to complete the integration.
Open the project with Android Studio, connect to an Android device, and compile and run the project.
-
If you have questions, see FAQs.
-
To learn about how the TRTC SDK can be used in different scenarios, see Sample Code.
-
For complete API documentation, see SDK API Documentation.
-
Communication & Feedback
Welcome to join our Telegram Group to communicate with our professional engineers! We are more than happy to hear from you~ Click to join: https://t.me/+EPk6TMZEZMM5OGY1
Or scan the QR code