4-23-2024
When starting a project or development, I like to try and nail down what the end goal is and what the user experience should look/feel like. The concept was to build out something that when a user had paused for an extended period while working, a chunk of the code that needed the most revisions would highlight. The user could hover over the code and get an explanation of what might be wrong or could be improved, along with a helpful suggestion. What I wanted was for the user to very clearly understand the difference between the two code chunks why it mattered. Something to help them learn for when they write code in the future and could showcase the great work done on our AI helper CodeTeacher.
The team and I settled on the idea that the code should be highlighted, with a fading feature so it is clear that there is an action they can do on their code section. When the popup appears, after hovering, they can easily apply or dismiss the suggested code chunk and keep going.
Building A Highlight Extension for VSCode
To build something like this was gonna be a pain because I was gonna have to make myself familiar with some of the biggest pains within the system….a VSCode editor. To start with this I need to build the functionality to highlight multiple lines of code. It would need to take in the EditorView of the VSCode component, along with the start and end lines to determine where the highlight needs to go.
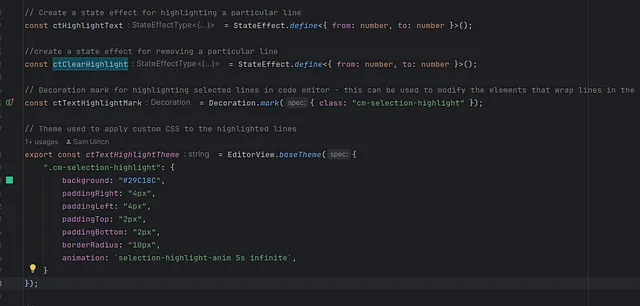
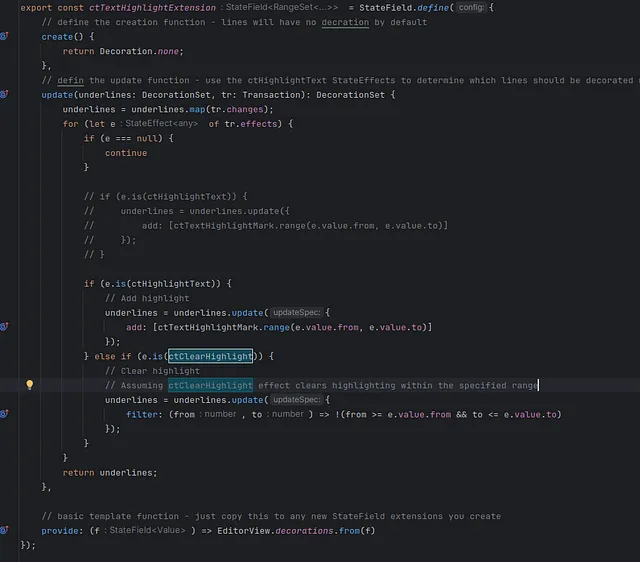
What I need to do first is create something to hold in the variables I will need. Something for holding the lines that will be highlighted, something to remove those highlighted lines, and finally a decoration marker for the lines. Next, I need to create the highlighting style, this is the ctHighlightTheme above. Finally, the most important function of it all is the one that will add in the styling when ctHighlightText is changed and dispatch is called. That would be the ctHighlightExtension function.
This function both adds and remove the styling on the specified lines whenever the value ‘highlightText’ is changed. Once this is done, whenever this function is called the user will be able to see this styling displayed in the editor. This is the main part for adding styling and is added to the editor as an extension.
Highlighting the lines of code
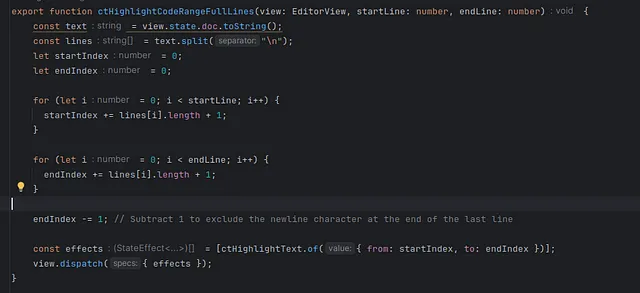
Finally, I need to build the functionality to calculate the lines and update the editor’s view so full lines are highlighted and not just letters. The function above (ctHighlightCodeRangeFullLines) converts the lines of code within the editor to something more parsable, first. After this I need to get the amount of characters in total from all the lines so I know the index within the string. This is how I determine the start and end index. Now that the logic is mostly done, I set the state effect variable, ctHighlightText, and then call ‘dispatch’ and make a callback to the editor. Finally, when this function is called the user will see the lovely animation we worked so hard on. The only problem is, how do we remove it? That’s what this next part is for.
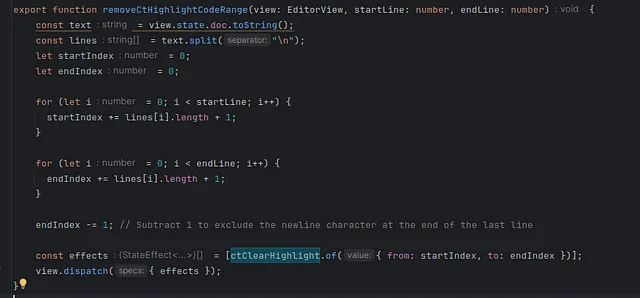
This function is very similar to adding for a full code range, except instead of setting effects as ctHighlightText, it sets ctClearHighlight. This should remove all of the highlighting to the user as long as dispatch is called again.
Integrating This Into An Editor File
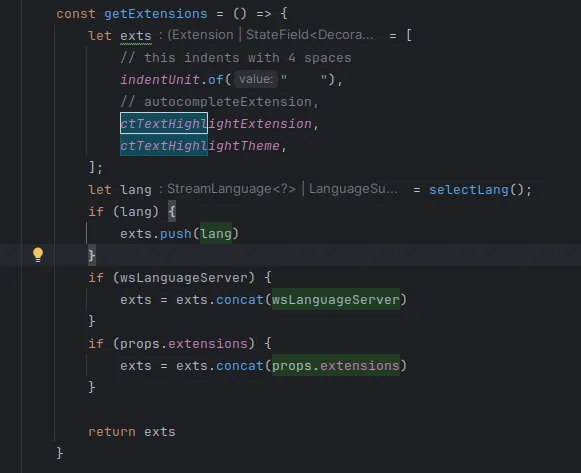
The final important part is to add this into the editor file, it can be added like any other extension by importing the main highlight function and the theme then adding them in a function used to grab the extensions, like this:
Final Setup
You have now built a highlight extension for VSCode! What is left? Well, you need to call it! Within the file that your editor is called in the html, you must add a reference to your editor. Something like this:
Now when you go to call the functionality, you can get the editor view for the functions you worked so hard on before. In our implementation, the function for highlighting is called within a different file and then it is exported out and put in the html below like so:
Within the ByteSuggestions2 file, is where both ctHighlightCodeRangeFullLines and removeCtHighlightCodeRange are called. For reference, this is what it would look like:
Looking At The Fruits Of Our Labor
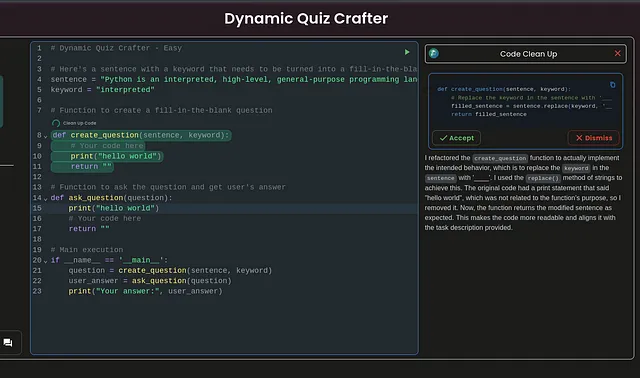
You will need to add your unique logic for finding where you want the start and end to be. In our integration, it finds the start of a function or definition and goes until its end, but that will be unique to your implementation. Here we use what people in the business call…magic… as in I can’t tell you but it’s cool. Now that you have built all this out you should have something that looks like this:
In my implementation, I called the GIGO AI helper, CodeTeacher, and asked for his wisdom on what would make the code better, so the full integration on GIGO looks a bit more like this:
Now, when the user works on their code they have the option to click the “Clean Up Code” button and get a beautiful highlight along with some helpful advice on how to improve. As the user you can read into CodeTeachers suggestions to help yourself learn, and then use this to determine if you want to accept or decline the code given. It will even fill out and replace the code for you.
If you are interested in attempting this challenge, you can go to https://www.gigo.dev/signup and make an account, or click the link below to go directly to this project and try it right away! Happy Coding:
