You can use the Builder.io CLI to spin up your Builder space, fully configured, faster than from scratch.
The file builder-demo-space.zip contains the space clone that we're going to use to initialize your new space in the following steps.
git clone https://github.com/BuilderIO/nextjs-edge-personalization-demo.git
cd nextjs-edge-personalization-demo
unzip builder-demo-space.zipHead over to your organization settings page and create a private key, copy the key for the next step.
Next, replace <private-key> with the key you copied in the previous step
npm install --global "@builder.io/cli"

builder create --key "<private-key>" --name "Next.js Personalization" --debug
You will be greeted with a message that includes a public API key for your newly minted Builder.io space.
Your new space "my space" public API Key: 012345abcdef0123456789abcdef0123Finally, copy your Public API Key and paste it into site/config/builder.ts
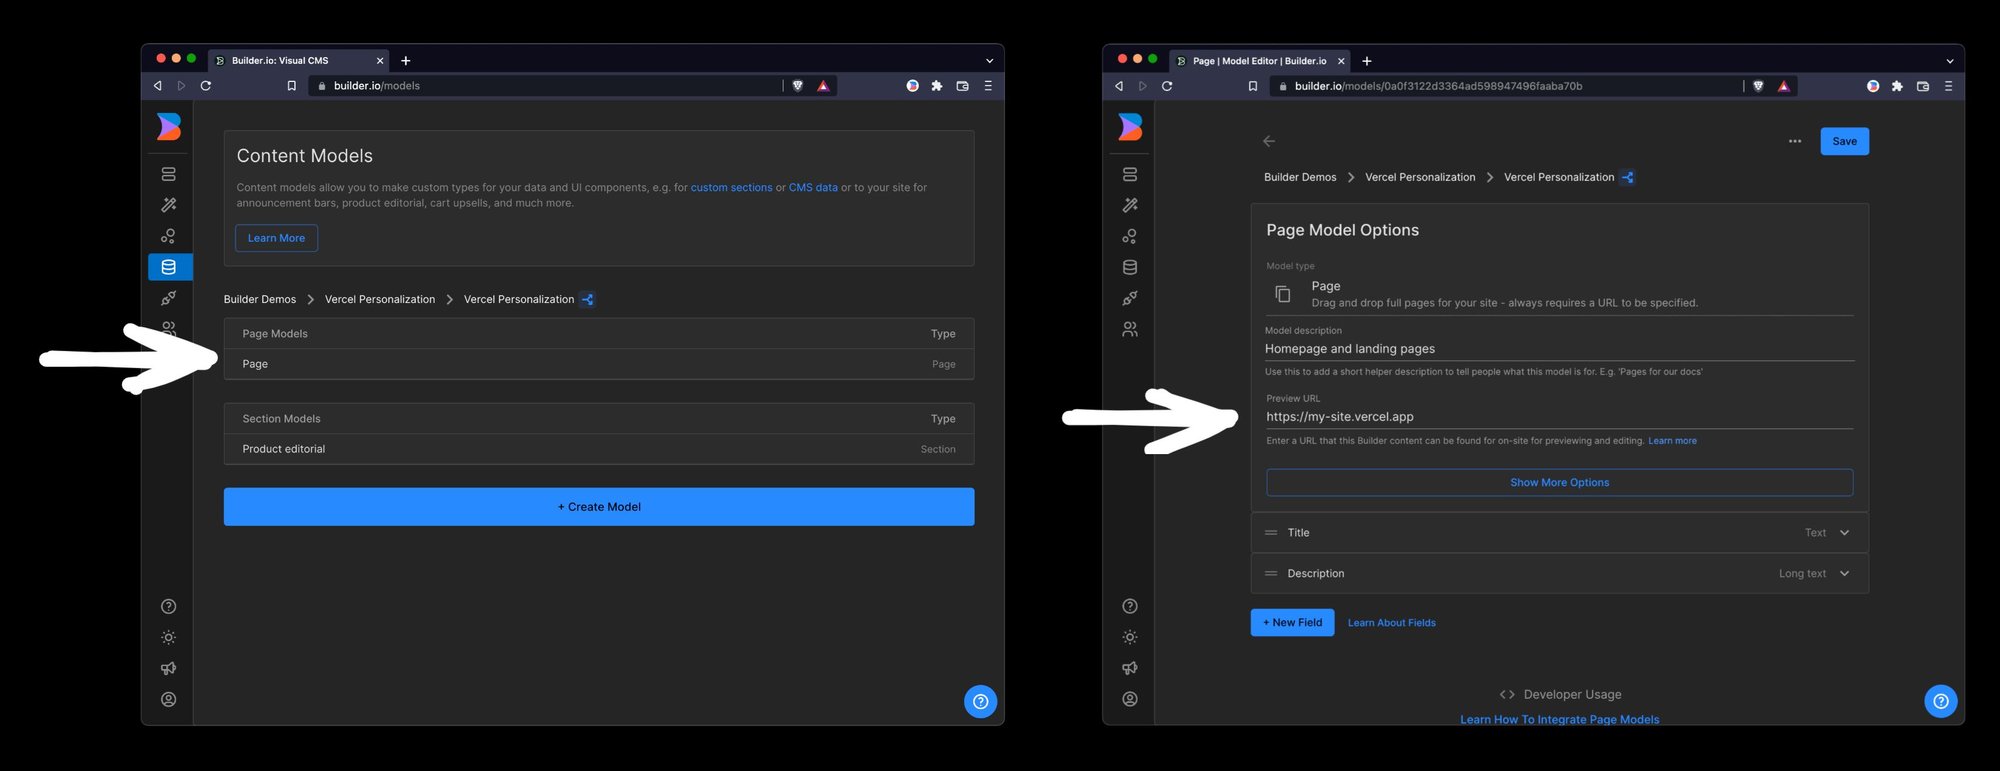
Once you deploy to vercel, you can update your Preview URL to use the live URL so now others on your team can create content on your new site with Builder.io.
E.g. if your site is now live at https://my-site.vercel.app, you can go back to builder.io/models, choose the page model, and update your Preview URL to https://my-site.vercel.app and save.
Alternatively, you can use local URLs as described here.
Additionally, you may want to update your Site Url over in your account settings to use this URL as well

